This post will show how to enter your license information into TypeItIn.
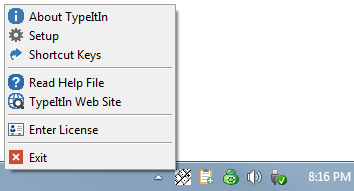
First right click on the white TypeItIn icon in your task bar tray. This icon is located on the bottom right of your screen next to the clock. If the icon is not visible you might have to first click on the small show hidden icons button.
Then select Enter License from the pop up menu.
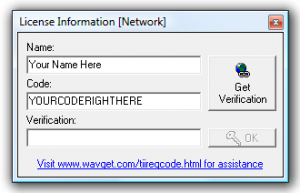
In the License Information window, enter your name and code exactly as in the license email you received.
Identical Capital Letters in the correct locations are important. Please make sure there are no spaces or other characters before or after your name and code.
Also make sure that you are using the version that you purchased a license for, the Professional, Network, or Enterprise version.
If you enter your name and code correctly, the Get Verification button will be enabled. Make sure you are connected to the Internet and click this button to open your browser with a page that will display your verification.
If the License Verification page does not display the verification string you entered your name or code incorrectly.
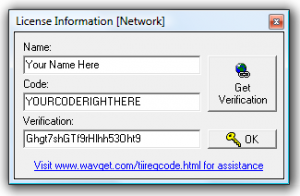
Copy the verification string from the web page to the verification box in the License Information dialog window. Again, please make sure there are no spaces or other characters before or after your name and code.
If you copy the verification string correctly the OK button will be enabled. Click the OK button to finalize the registration process.
To verify that your license was accepted, right click on the TypeItIn icon in the task bar tray and click on About TypeItIn in the tray menu.
The About TypeItIn dialog will display the TypeItIn version information and the registration name.


